Que sera, sera, whatever will be, will be, but first I need more coffee.

Category: Technology (Page 1 of 7)

On Refilling non-refillable fountain pens (and non-refillable cartridges)

In the past few years I’ve become a fan of fountain pens. I was actually looking for a way to write quickly and a lot on my iPhone. To no avail. I even tried the Swype keyboard once it became available to iOS, but still I just couldn’t get the hang of it. Someday, I hope to learn how to write quickly on my mobile devices (other than a laptop).

I’ve been writing in notebook since high school. I’ve never kept a formal diary or journal. In fact I tossed a large number these notebooks in 2000. About seven years ago I upped my game when I bought a moleskine on a lark. At first I used a regular ink pen, but eventually gravitated to fountain pens when I started reading on how to improve my handwriting (see whole arm movement or muscular movement).

My first fountain pen was a Pilot Varsity that my wife had amongst our pens and I started to play around with it. I eventually bought some more from an online retailer as I had no luck finding them in a local office supply store (though I didn’t check art stores). I suppose I could write this as a piece of article marketing and link to the online retailer where you can buy these pens and earn a pittance for directing you there. And maybe I will, but I’ll be up front about it. The idea isn’t to think of ways to earn money then write an article, but to monetize an idea.

And by that I mean, if you want to write with an fountain pen, you’ll need to buy materials, and I can make recommendations on what I’ve used and where I got them, I’m sort of giving free advertising to a retailer, and I may sort of earn a little money on the side from those recommendations, but it is all in the service of sharing my joy of writing with a fountain pen.

Technology shapes how we do things. Fountain pens lend themselves to writing in cursive.

Anyway, back to the Varsity. It is “non-refillable” unless you know what you are doing. This post shows you how, but it is missing one critical step. The author says how much ink he used and if you can measure it, great, but what if you need to eyeball it and just keep putting in the barrel until it’s full enough. Where do you stop? I looked at how far the nib goes back into the barrel and remembered where it stopped. It’s easy to see there’s a line where the barrel widens just a bit to fit the nib, so I used a straw which was narrow enough to fit inside the barrel and I dipped the straw into my ink bottle, put my finger over it, then lowered the straw into the pen barrel and removed my finger. I repeated this process about 3 times with the last step only getting a third the amount of ink, the first two put plenty of ink.

I don’t know if this is going to work. I put the nib back in with my Leatherman. It clicked. I turned the pen nib down to make sure no ink dripped out. I used an old newspaper and paper towels to catch and clean up any ink spillage or drips. I put the cap back on and letting the pen sit for a few minutes nib down to let the ink fill it, and I’ll give it a test. It could take several hours before enough ink gets to the point where I can write.

How to refill your Pilot Varsity
https://peninkcillin.blogspot.com/2011/07/how-to-refill-your-pilot-varsity.html

Addendum

I wrote this post about three years ago and left it as a draft. Forgot about until now. Decided to update and publish. Once you start buying fountain pens you can use converters and refill them with ink, but you can also take the non-refillable cartridges and refill them with a blunt needled syringe. Just make sure you wash the cartridge before using them.

Second Addendum

If you want to try out fountain pens, I’d recommend getting a Platinum Preppy with some of their proprietary cartridges. For less than $10 you can decided if you like them. And if you do, you can prepare to spend a lot more on pens, inks, and paper. A lot more. You can get decent pens under $30 but don’t be surprised when you see them going for $200 or $500.
Network Upgraded

I have successfully upgraded our home network. I went from an 802.11n to an 802.11ac wireless router. I turned the old wifi router into an wireless access point via powerline ethernet. It took me a while to find the instructions I needed to make a LAN-to-LAN network.

You have to do four things to the old router. 1. Turn off NAT, 2. Turn off DHCP. 3 change the IP address to at least +1 of the main router’s IP last digit (going from say 192.168.1.1 to 192.168.1.2). 4. Plug the ethernet router from the LAN port of the primary router to a LAN port on the old router. Do not plug it into the Internet port. If you do, when you change the IP address, you will not be able to access the web interface of the old router. I learned this the hard way.

I no longer need the wireless extender. I have good coverage in the two rooms I thought I might need the extender for now from the new wifi router. In fact I really only need the new wireless access point in the room I put it in.

I will probably upgrade our cable internet speed though it is quite fast enough for even 4k streaming video, but I’m in no rush as I don’t have a 4k TV yet.

On Upgrading Our Home Network

Currently we have cable internet. I have a cable modem, a dual band wireless router, and a dual band wireless extender. The wifi router is showing its age. I’ve moved all three devices around the house in an attempt to get better coverage. We have about 15 wireless devices though not all in use at the same time and some take up very little bandwidth, but about six of them use the most bandwidth. Then we will occasionally have up to four visitors that could each have two devices (mobile phone and laptop).

So I’ve done some research on ways to improve our network. Why? The main reason is we live in a U or J shaped brick house. It was U-shaped but they added on a master bedroom making it more of a J. And the way it was added on we have interior brick walls. We remodeled our kitchen and dining room and I forgot that I could have had ethernet cables installed while the ceiling was torn up, but I didn’t do that. It would be expensive but the best option would be to hardwire the house with wireless access points. The second best option might be to use ethernet over power-line with wireless access points. The third best would be to install a mesh wifi network but they aren’t cheap either.

Our house has unused cable outlets because we’ve disconnected cable TV but not cable internet. It also has unused telephone lines as we’ve dropped the landline (Our DSL options suck, very slow). There might be a way to repurpose them with the right equipment. The second best option edging out power-line would be to run weatherproof ethernet cabling on the outside of the house that would be certainly cheaper than trying to run it in the house. This would be a security risk as someone could tap into the external cabling (unless all the traffic was encrypted), and eventually the weatherproofing would wear out.

I think the cheapest option would be to install power-line ethernet with wireless access points. At least until we can decide whether to do the proper thing or how much longer we live in this house, though we aren’t planning on moving for quite a while.

Stand up for Net Neutrality

July 12 is the day of action, read more over at EFF.org who is dedicated to fighting for your online rights. There is absolutely no reason to create a two tier system for the internet for the haves and have nots. Back in the late 1990’s a lot fiberoptic cable was laid in this country and to this day  most of it is not being used. The real problem is the last mile problem that is getting the high speed connection from the internet backbone into the home. Infrastructure is a shared resource we all benefit from.

The internet backbone is the 21st century of the interstate highway system. The highway system is a great example of a public-private partnership.  We own our vehicles and our taxes pay for the roads that everyone can use. Now we have seen an increase in toll roads that are encroaching on that public road system. The internet backbone is mostly privately owned now, but in reality should be treated as a public utility just as the highway system is.

Net Neutrality like the highway system lets you access the internet regardless of whether you have a in expensive PC, a mobile device, or a top of the line gaming system. As a freelancer my work is dependent on the internet, and small business it the main job creator not big business. If I had to pay more to access the internet and my clients too they would have less incentive and not participate fully in our vibrant economy which would no longer be vibrant without our active participation.

It is also vital for free speech and is as much a First Amendment issue. The internet is now without it’s dangers and predators, but we with net neutrality active and tech savvy citizens can spread the word easier to help protect their families and communities.

Raspberry Pi Print Server

We have two printers in our house, an old Brother laser printer and a newer HP color laser printer. The newer printer has built in wifi and we can print via wifi directly or through the home wifi network. I did have a Raspberry Pi print server set up and working with my old Pi (model B version 1)  and could print via wifi on it. I recently purchased a Raspberry Pi Zero and wanted to set it up as a print server.  Install the following packages:

 sudo apt-get install cups

and then configure user pi

 sudo usermod -a -G lpadmin pi

[Note– It is recommended that you change the default password of pi to something more secure or replace the pi user with another user name  with a strong password as I did for better security]

I have a Brother HL-2140 and you can get the Linux drivers from Brother
http://support.brother.com/g/b/producttop.aspx?c=us&lang=en&prod=hl2140_all

However, it turns out they don’t work on the Raspberry Pi as it uses an ARM chip to run it’s flavor of Linux and not an i386 based Linux, so you’ll need to use HP’s HPIJS driver – PPDs for compatible PCL-5e-based non-HP laser printers

https://www.openprinting.org/driver/hpijs-pcl5e

You can select your printer in this case the Brother HL-2140 and it will generate a PPD file, but it won’t on it’s own as you’ll need to install the follow packages.

 sudo apt-get install hpijs-ppds printer-driver-hpijs

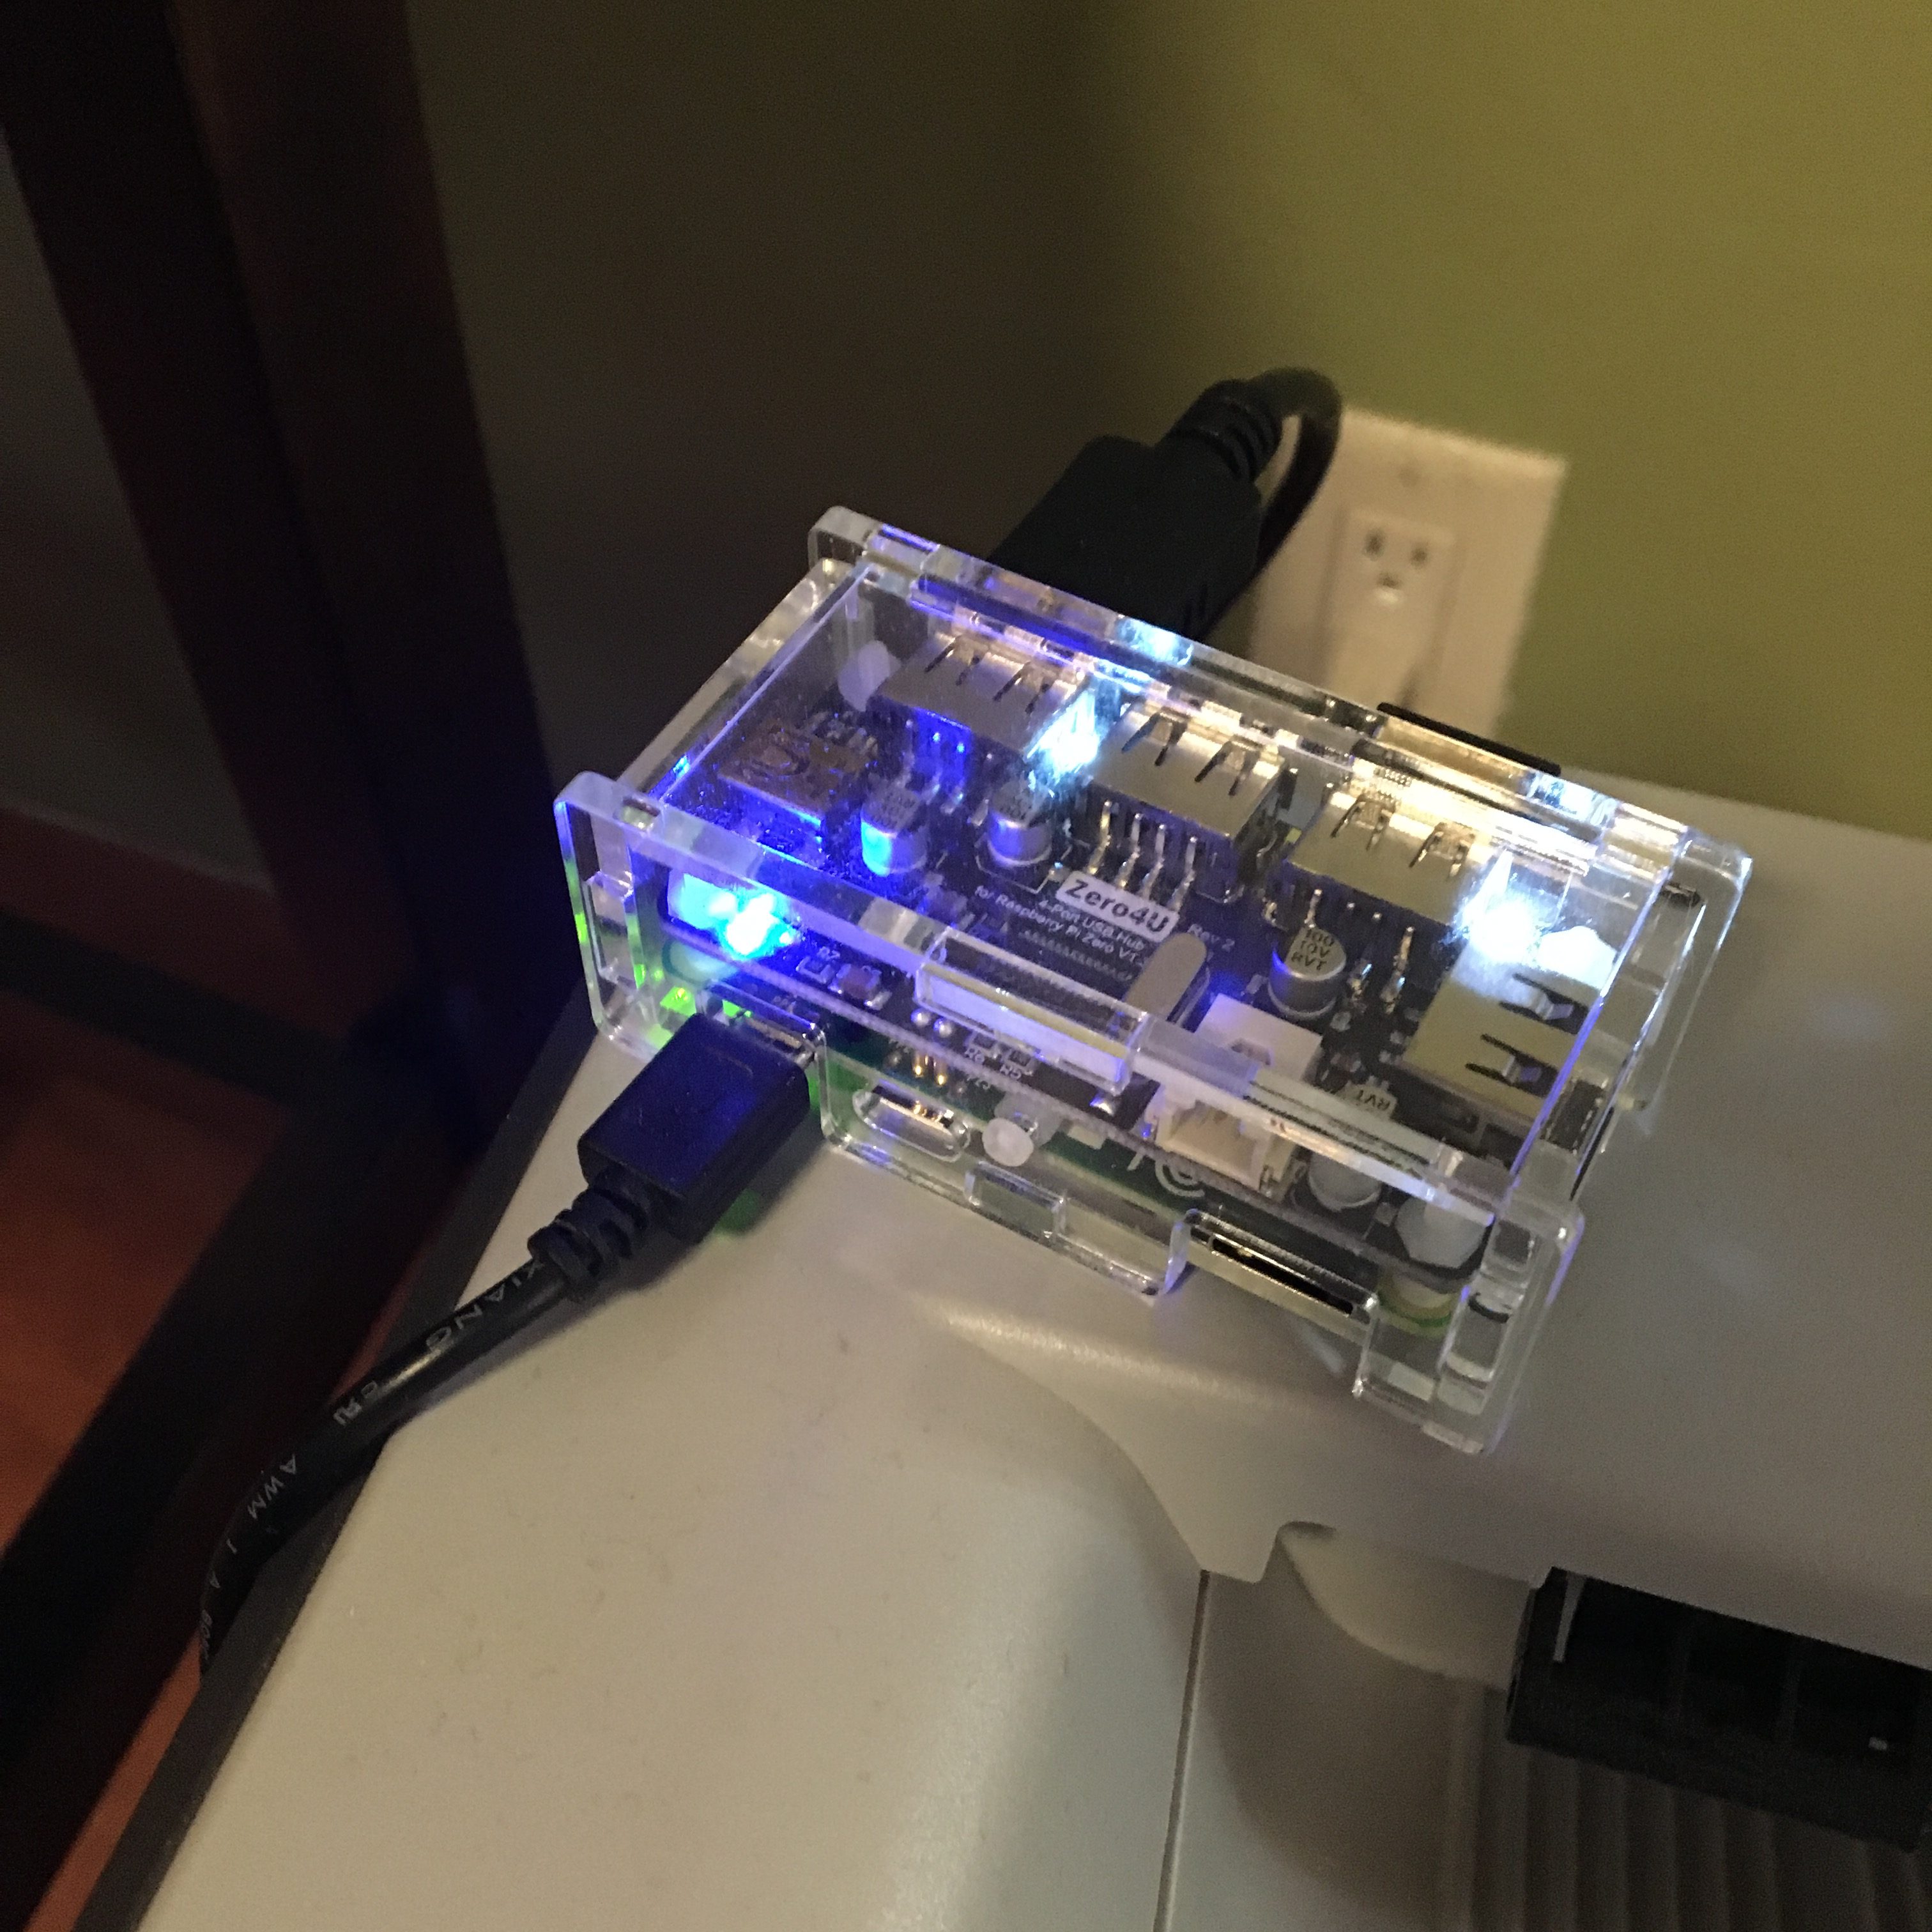
You’ll need to add the driver via the browser. Go to localhost:631 or whatever the IP address is on your network to access the CUPS web interface. Connect the printer via USB to the Pi. Speaking of USB, I recommend getting a Zero4U 4 port USB hub which piggybacks onto the Raspberry Pi Zero in this case v1.3. Make sure which Zero version you have to get the right hub.

http://www.uugear.com/product/zero4u/

I also purchased a case, a wifi dongle, and a mini-HDMI to HDMI cable. I had a USB keyboard, USB mouse, and monitor with HDMI to connect to the Pi Zero Once you have the Pi Zero configured and connected with a wifi dongle and the IP address you’ve assigned it.

My next step is to get a short USB cable and a way to secure the print server to the printer, probably a velcro strip or something.

How much did it cost? The Zero costs $5, but I needed a power supply ($8), wifi dongle ($12), and SD Card ($10). I paid about $18USD for the Zero4U USB hub, plastic case and shipping from the Czech Republic. I’m not counting the other accessories I bought (mini-HDMI to HDMI cable) or needed (USB cable), but just for the making the print server itself it cost about $53. I’m going to leave out the countless hours of frustration getting it to work because I couldn’t get CUPS to work on the Zero to print. It would talk the printer. I could see it try to do something but nothing would happen. It wasn’t until I got the hpijs packages installed that I was able to get it to print. I’d set up CUPS before on laptops. When I started this project wireless print servers were a little more expensive, but I just found one on Amazon for $40. So I didn’t save any money, and I wasted a lot of time getting it to work. So if you just need a wireless print server for an old laser printer, then just buy one, but if you are into Raspberry Pis then this is what I did.

« Older posts

© 2024 Christopher Merle

Theme by Anders NorenUp ↑